

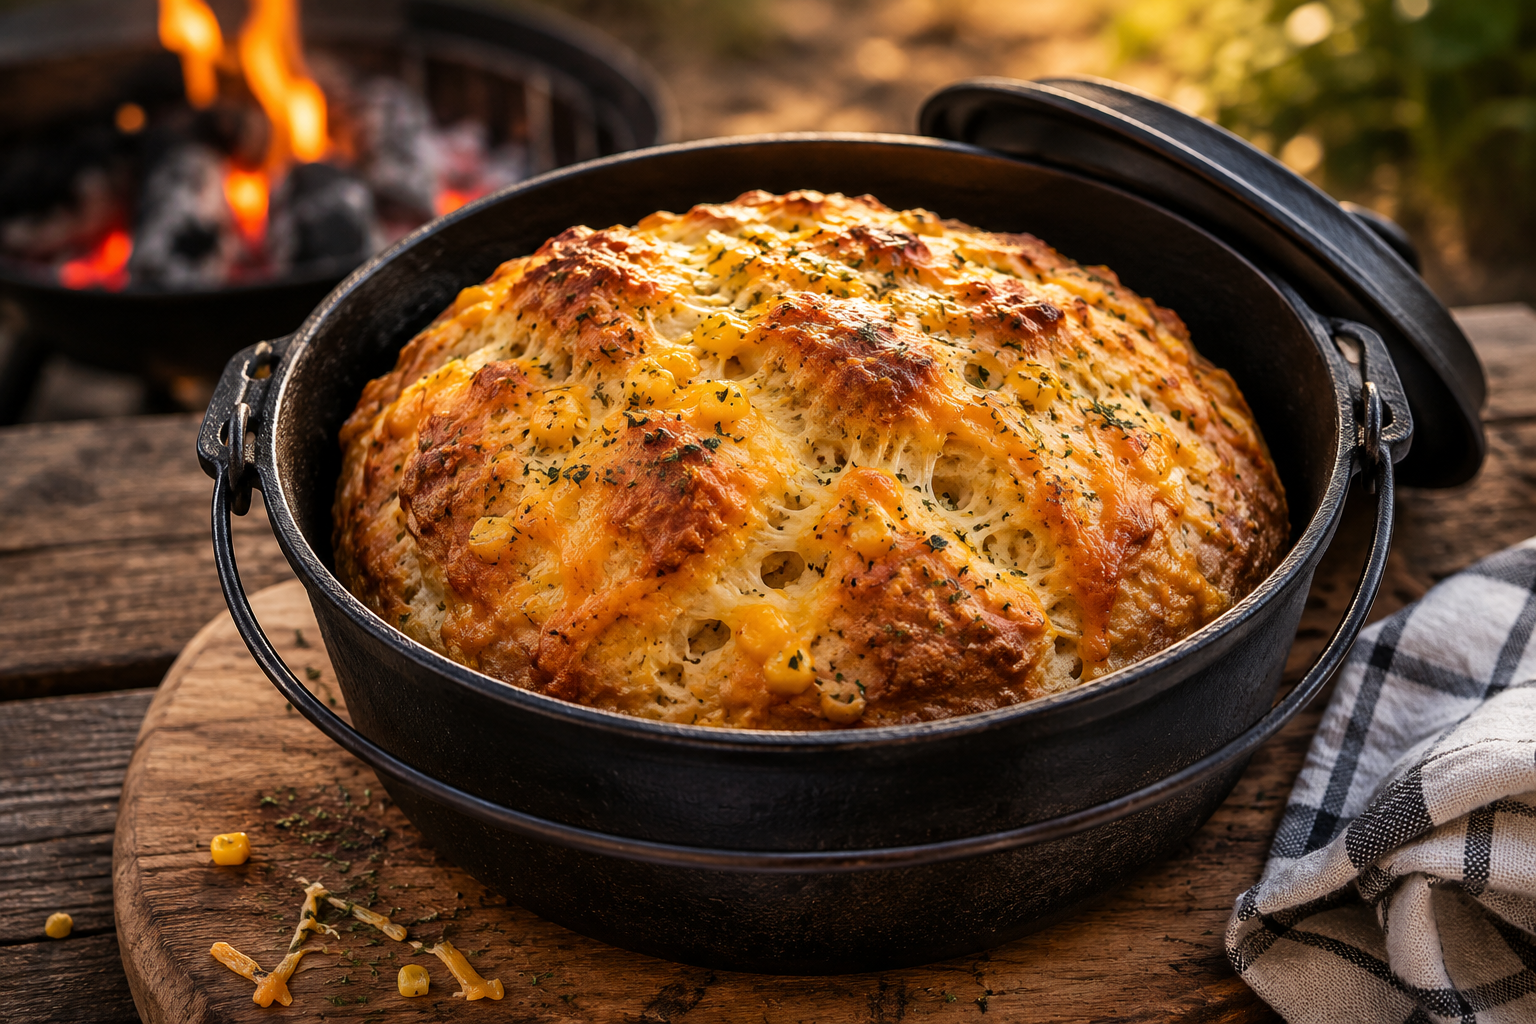
Few things bring people running quite as quickly as the smell of freshly baked bread. Add melted cheese, sweet corn and the smoky aroma of a fire and you have something truly irresistible.
Whenever I make cheese and corn pot bread at a braai, a family gathering or a relaxed weekend lunch, it becomes the centre of attention. People who claim they are only having a small slice somehow find themselves reaching for a second piece and often a third.
For me this bread is more than a recipe. It is comfort, hospitality and togetherness baked into one golden loaf. It is the kind of food that encourages people to linger around the table a little longer. It pairs beautifully with a hearty potjie, a bowl of soup or a simple salad. It also disappears remarkably quickly all by itself.
One of the reasons I love this recipe so much is that it feels both rustic and special. It is easy enough for beginners yet impressive enough to serve when entertaining guests. The combination of sweet corn and savoury cheese creates a flavour that appeals to almost everyone.
Today I am sharing my favourite cheese and corn pot bread recipe along with practical tips that help ensure success every time.
One of the pleasures of this bread is the combination of flavours and textures. Mature Cheddar provides a rich, savoury taste, while the sweetcorn adds little pockets of sweetness throughout the loaf. The eggs and melted butter or margarine contribute to the richness of the dough, helping to create a tender crumb.
The cheese sprinkled over the top adds another layer of flavour as the bread bakes. It creates an inviting finish that makes the loaf look as good as it smells, although the most important thing is ensuring that the bread cooks evenly all the way through.
Pot bread is also wonderfully versatile. It can accompany braaied meat, be served with a hearty potjie or turn a simple bowl of soup into a more substantial meal. You can enjoy it with butter while it is still warm or serve it as part of a generous sharing table.
There is no need for elaborate accompaniments. Sometimes a fresh loaf, a little butter and a meal shared with people you love are quite enough.
This recipe uses familiar ingredients, but preparing them properly makes the process easier and helps you achieve a more consistent result.
You will also need butter or non-stick cooking spray to grease the cast iron pot.
Stone-ground white flour forms the structure of the bread. Different flours can absorb liquid differently, so pay attention to the consistency of the dough as you mix. You want a soft, workable mixture that holds together rather than a stiff dough that is difficult to combine.
Instant dry yeast helps the dough rise and gives the loaf a lighter texture. Check that your yeast is within its use-by date and follow the instructions on the packet. The water should be warm rather than hot, as excessive heat can damage the yeast.
Mature Cheddar gives the bread its distinctive savoury flavour. A mature or vintage variety generally provides a stronger taste than mild Cheddar. Grate the cheese before you begin so that it is ready to add to the mixture.
Whole kernel sweetcorn brings sweetness and texture. Drain it thoroughly before adding it to the dough. Excess liquid can change the consistency of the mixture, making it wetter than intended.
Eggs and melted butter or margarine contribute richness and moisture. Allow the melted fat to cool before mixing it with the beaten eggs. It should be melted but not hot.
The salt and sugar provide seasoning, while the optional onion adds a savoury note. A pinch of cayenne or black pepper can give the bread a little extra character without overpowering the cheese.
Measure out your flour, yeast, salt and sugar. Drain the sweetcorn thoroughly, grate the cheese and chop the onion if you are using it.
Melt the butter or margarine and set it aside to cool. Beat the eggs in a separate bowl and measure out the warm water.
Having everything ready before you start mixing makes the process easier, particularly when you are preparing the bread as part of a larger braai meal.
Place the stone-ground white flour in a large mixing bowl. Add the instant yeast, salt, sugar and optional cayenne or black pepper.
Add the drained sweetcorn, chopped onion if using it and 200 ml of the grated Cheddar cheese. Mix everything together until the ingredients are reasonably evenly distributed throughout the flour.
Take a moment to check that the corn has drained properly. This small step helps you maintain better control over the moisture in the dough.
Combine the cooled melted butter or margarine with the beaten eggs and warm water. Stir them together before pouring the mixture into the bowl of dry ingredients.
Mix well until the ingredients come together into a soft dough. You can begin with a sturdy spoon and use your hands as the mixture thickens, scraping any loose flour from the sides of the bowl.
The dough should be soft and cohesive. Because it contains cheese, corn and eggs, it may not feel exactly like a plain bread dough. Avoid adding extra flour immediately if it seems slightly sticky. Give the ingredients time to come together before deciding whether the consistency needs attention.
Cover the bowl with a clean cloth and leave the dough in a warm place for approximately 20 minutes, following the recipe.
The yeast needs time to begin working, and the temperature of your kitchen will influence how quickly the dough rises. Treat the stated time as a guide and look for signs that the dough is becoming lighter and increasing in volume.
Keep the bowl away from direct heat. A comfortably warm environment is preferable to a hot spot that could damage the dough.
While the dough is resting, grease your cast iron pot generously with butter or non-stick cooking spray. Pay particular attention to the bottom and sides so that the bread is less likely to stick.
Use a pot with enough room for the dough to expand during its second rise and while baking. A pot that is too small can leave the dough crowded, while an excessively wide pot may produce a flatter loaf.
Make sure the lid fits properly and that you have a safe, stable outdoor cooking area ready before arranging your coals.
Once the first rise is complete, gently knock down the dough to release some of the larger air pockets.
Transfer it to the greased pot and spread it out reasonably evenly. Sprinkle the reserved 50 ml of grated Cheddar over the top.
Cover the pot with its lid and leave the dough to rise for another 35 to 45 minutes, as specified in the recipe. It should increase noticeably in volume before baking.
The exact amount of rising will depend on the temperature, the condition of the yeast and the dough itself. Try not to rush this stage, as the rise contributes to the finished texture of the bread.
Baking pot bread over coals requires a little more attention than baking in a conventional oven because the heat is less predictable.
Allow your fire to settle into a bed of established, glowing coals rather than placing the pot over vigorous flames. Position the pot on a stable surface with enough heat beneath it to cook the bread steadily.
Place some hot coals on the lid to provide heat from above. This helps the top bake and brown while the base cooks. The aim is to distribute the heat as evenly as possible.
If the coals beneath the pot are too hot, the bottom may burn before the centre is ready. Too little heat can leave the bread pale and undercooked. The size of your pot, the amount of dough, the wind and the condition of the coals all influence the result, so observe how your bread is baking and make small adjustments when necessary.
The original recipe gives a cooking time of approximately 35 to 40 minutes. Use this as a guide rather than a guarantee, as the actual time will depend on your pot and fire.
Look for a golden-brown crust and a loaf that has risen well. The traditional hollow sound when you tap the bread can provide a useful clue, but it is not a completely reliable test for a rich loaf containing cheese, corn and eggs.
If you are uncertain whether the centre is cooked, use a food thermometer where practical. A centre temperature of at least 90°C is a useful guide for this style of bread. If it needs more time, continue cooking gently rather than assuming it is ready because the crust looks brown.
If the bottom begins to brown too quickly, reduce the heat beneath the pot where possible and allow the bread to continue cooking more gently.
Always use suitable heat-resistant gloves or tools when handling the pot and lid. Cast iron retains heat for a long time, and both can cause serious burns.
When the bread is cooked, carefully remove the pot from the coals and transfer the loaf out of the pot if it releases easily.
Allow it to rest for approximately 10 minutes before cutting. This gives the loaf time to settle and makes it easier to slice without squashing the soft interior.
Serve the bread warm with butter. The combination of the savoury cheese, sweetcorn and tender crumb makes it a satisfying accompaniment to a braai or a hearty family meal.
A few practical details can make the difference between a loaf that cooks beautifully and one that needs a little more practice.
Use established coals rather than strong flames. A steady source of heat is easier to manage and reduces the risk of scorching the base.
Watch the heat beneath the pot. If the bottom is browning too quickly, spread out the coals or move the pot to a cooler area where possible.
Use heat on the lid. Heat from above helps the top of the loaf bake more evenly instead of leaving the base to do all the work.
Drain the sweetcorn well. Excess moisture can make the dough wetter than intended.
Give the dough time to rise. The recipe’s timings are useful guides, but temperature and yeast activity influence how quickly the dough develops.
Avoid lifting the lid repeatedly. Each time you open the pot, heat escapes and the cooking time becomes less predictable.
Make notes after each bake. If you use the same pot regularly, noting the coal arrangement and cooking time can help you achieve more consistent results.
One of the lovely things about this bread is how easily it fits into a South African meal.
Serve slices alongside boerewors, lamb chops, chicken or steak. Add a fresh salad and perhaps some grilled vegetables for a balanced spread. The savoury cheese works particularly well with smoky flavours, and a warm slice of bread is useful for enjoying the juices from the meat.
A rich beef, chicken or vegetable potjie makes a wonderful companion. The bread is substantial enough to enjoy with the gravy without needing lots of additional sides.
On a cooler evening, serve the bread with tomato soup, vegetable soup or butternut soup. It adds substance to a simple supper and makes a pleasant change from ordinary sliced bread.
Cut the loaf into smaller pieces and serve it with sliced tomatoes, cucumber, olives and a few other simple accompaniments. Because the bread already contains cheese and corn, you don’t need to overwhelm the table with too many extra flavours.
The best accompaniments are often the simplest ones. Let the bread be part of the meal rather than making it compete with everything else on the table.
A dense loaf can result from yeast that is no longer active, unsuitable water temperature or insufficient rising time. Check the yeast’s use-by date and make sure the water is warm rather than hot. Give the dough a suitable place to rise and look for an increase in volume rather than relying entirely on the clock.
This usually suggests that the heat beneath the pot is too intense. Reduce the coals underneath where possible and use a more even arrangement of heat on the lid. Allow the bread to continue cooking gently until the centre is ready.
The yeast may be old, the water may have been too hot or the room may have been too cold. Check your yeast and give the dough sufficient time in a comfortably warm place. If the kitchen is cool, rising may take longer than expected.
The corn may not have drained sufficiently, or your flour may absorb liquid differently from another brand. A slightly sticky dough is not necessarily a problem. Avoid adding large amounts of extra flour straight away, as this can change the balance of the recipe.
Look for a golden-brown crust and a loaf that has risen well. A hollow sound when tapped can be helpful, but it is not definitive. A thermometer provides a more reliable way to assess the centre of a rich loaf such as this one.
If the crust is already brown but the centre needs more time, reduce the heat and continue baking carefully.
You can prepare the ingredients ahead of time, grate the cheese and drain the corn before mixing. However, the dough still needs time to rise and the bread is best served freshly baked. For the most predictable result, prepare the dough and follow the rising stages close to cooking time.
Yes. The onion is optional in this recipe. Leaving it out will give you a simpler cheese and corn flavour without changing the intended role of the other ingredients.
You can experiment with other cheeses, but the flavour and texture may change. Mature or vintage Cheddar provides the savoury flavour intended for this recipe. If you try another cheese, make a note of the result before changing anything else.
This recipe is written for a cast iron pot over coals. An oven may offer an alternative, but the temperature and cooking time would need to be established for your particular recipe and equipment rather than assumed to be identical.
Allow the bread to cool, then store it in an airtight container at room temperature for a short period, provided it is kept in a cool, dry environment. Because this loaf contains eggs, cheese and corn, avoid leaving it in hot conditions for extended periods. Refrigerate leftovers promptly when necessary and reheat thoroughly before serving.
Freezing may be a practical way to keep leftovers for longer. Once the bread has cooled completely, wrap it well to protect it from freezer burn. Thaw it safely and reheat until warmed through. The texture may be slightly different from freshly baked bread, but it can still be enjoyable.
You don’t need a cupboard full of special equipment to make a lovely pot bread, but a few well-chosen tools can make the process easier. If you enjoy baking over the coals or making homemade bread regularly, these are some items worth considering. Choose what suits your kitchen, your cooking style and your budget.
Some of the products mentioned above are linked to Amazon. These are affiliate links, which means I may earn a small commission if you purchase through one of them, at no additional cost to you. As an Amazon Associate I earn from qualifying purchases.
For my South African readers, please check the final price, international shipping costs, import duties and any other applicable charges before ordering. These additional costs can make an otherwise reasonably priced product considerably more expensive.
You don’t need every item on this list to make good pot bread. Start with the equipment you already have and consider additional tools only when they will make your own cooking easier. Thank you for supporting Rustic Daisy and helping me continue to share recipes and ideas with you.
A cast iron Dutch oven is useful for cooking over a fire because it holds heat well and has a lid that helps distribute warmth around the bread. It can also be used for potjies, stews and other one-pot meals, making it a versatile addition to an outdoor cooking setup.
Explore cast iron Dutch oven pots
A dough scraper is a simple but useful tool for gathering dough from a work surface, dividing portions and helping transfer sticky mixtures. It can also make cleaning up easier when flour and dough have found their way onto the kitchen counter, as they inevitably seem to do.
Explore dough scrapers and cutters
Handling a hot cast iron pot and moving its lid can be one of the trickier parts of baking over coals. Heat-resistant gloves designed for high-temperature cooking can provide useful protection when handling hot equipment. Check the manufacturer’s temperature rating, the areas covered by the gloves and the instructions for safe use. No gloves make handling hot cast iron completely risk-free.
View heavy-duty barbecue gloves
If you often bake bread at home, suitable storage helps keep your loaf protected between meals. Beeswax-coated bags are one option to consider, although their performance varies and they are not necessarily ideal for every type of bread or climate. Allow your pot bread to cool completely before storing it and follow the bag manufacturer’s care instructions.
View beeswax bread storage bags
A serving board gives you a convenient place to present your freshly baked bread alongside butter, cheese or other braai accompaniments. Choose a board with enough room for the loaf and check whether it is intended for cutting as well as serving. A board that is easy to clean and store is often the most practical choice.
Explore outdoor serving boards
Homemade bread can be difficult to slice evenly when the crust is firm and the centre is soft. A bread slicer with an adjustable guide can help you produce more consistent slices for serving. Let the loaf rest before cutting, as slicing too soon can compress the crumb.
An instant-read thermometer can help you check the centre of a loaf when you are unsure whether it has cooked through. This can be particularly helpful when baking over coals, where the heat is less predictable than in an oven. Choose a thermometer intended for food and follow its instructions for taking an accurate reading.
View instant-read food thermometers
There is something special about placing homemade bread in the middle of the table and watching everyone reach for a slice. It doesn’t have to be perfect or complicated. Sometimes the simplest recipes are the ones that bring the most pleasure, especially when they are shared with people who matter.
May your kitchen always be filled with comforting aromas, your table with good food and your home with the warmth of people gathered together.
With love and a little daisy sunshine,
The Secrets to Hosting the Perfect South African Potjie
The Best Comfort Food Ideas for Winter